What is a webhook?
A webhook is a somewhat counter-intuitive mechanism by which a remote application can be notified about some action taken in a host system. For this little project, I wanted to create a webhook to get notified by Jira when some action was taken in Jira, e.g., issue creation, deletion, update.
The magic sauce is that the remote application (the one I’ll make in the following post) is the webserver, and the host system (Jira) just makes an HTTP call to the webserver when some action happens.
The rough flow is:
- user creates an issue
- Jira calls an HTTP endpoint with the issue
- the remote system’s webserver receives the HTTP call.
Tools
I was assigned to figure out how to configure a Jira webhook for a research project at work. Our team uses a Scala monolithic web-app, but I chose to spike out this application in a different set of tools. For one, I’m not a Scala expert (yet), and another, I wanted to prove out the Jira webhook before coupling it tightly into my team’s application.
Here’s the set of tools I chose:
- Express.js (for the webhook server)
- node (to run the server)
- nginx (as a reverse proxy)
- certbot (SSL)
- Digital Ocean Ubuntu Droplet
- GitHub
- Jira
Digital Ocean was a matter of convenience because I had a droplet already running that I use for my personal projects. I chose Express because it lets me set up a quick webserver without any boilerplate. I chose to run the application directly on nginx (instead of containerized) because, frankly, it seemed easier to get it started. I’m leaving the containerization for another night.
Setting up Express
This was the easy part. I found some code online at dockerize.io and basically followed it to the letter. For reference, I created a new folder called webhook-server, and ran these commands:
npm init -y
npm install express -save
I created a server.js and pasted in the code from the above dockerize.io link:
const express = require('express');

//Create an app
const app = express();
app.get('/', (req, res) => {
    res.send('Hello world\n');
});

//Listen port
const PORT = 8080;
app.listen(PORT);
console.log(`Running on port ${PORT}`);
Running node server.js runs the server locally at http://localhost:8080
Get the code on the server
My flow for getting code on a server is to run
git init from the webhook-server folder, and in GitHub, create a new repository. I then set the remote url with git remote add origin (url)
Some might call me old-fashioned (I describe it as ‘learning at my own pace’) so I still SSH into the Ubuntu droplet and git clone the code onto the server.
Configuring the Jira Webhook
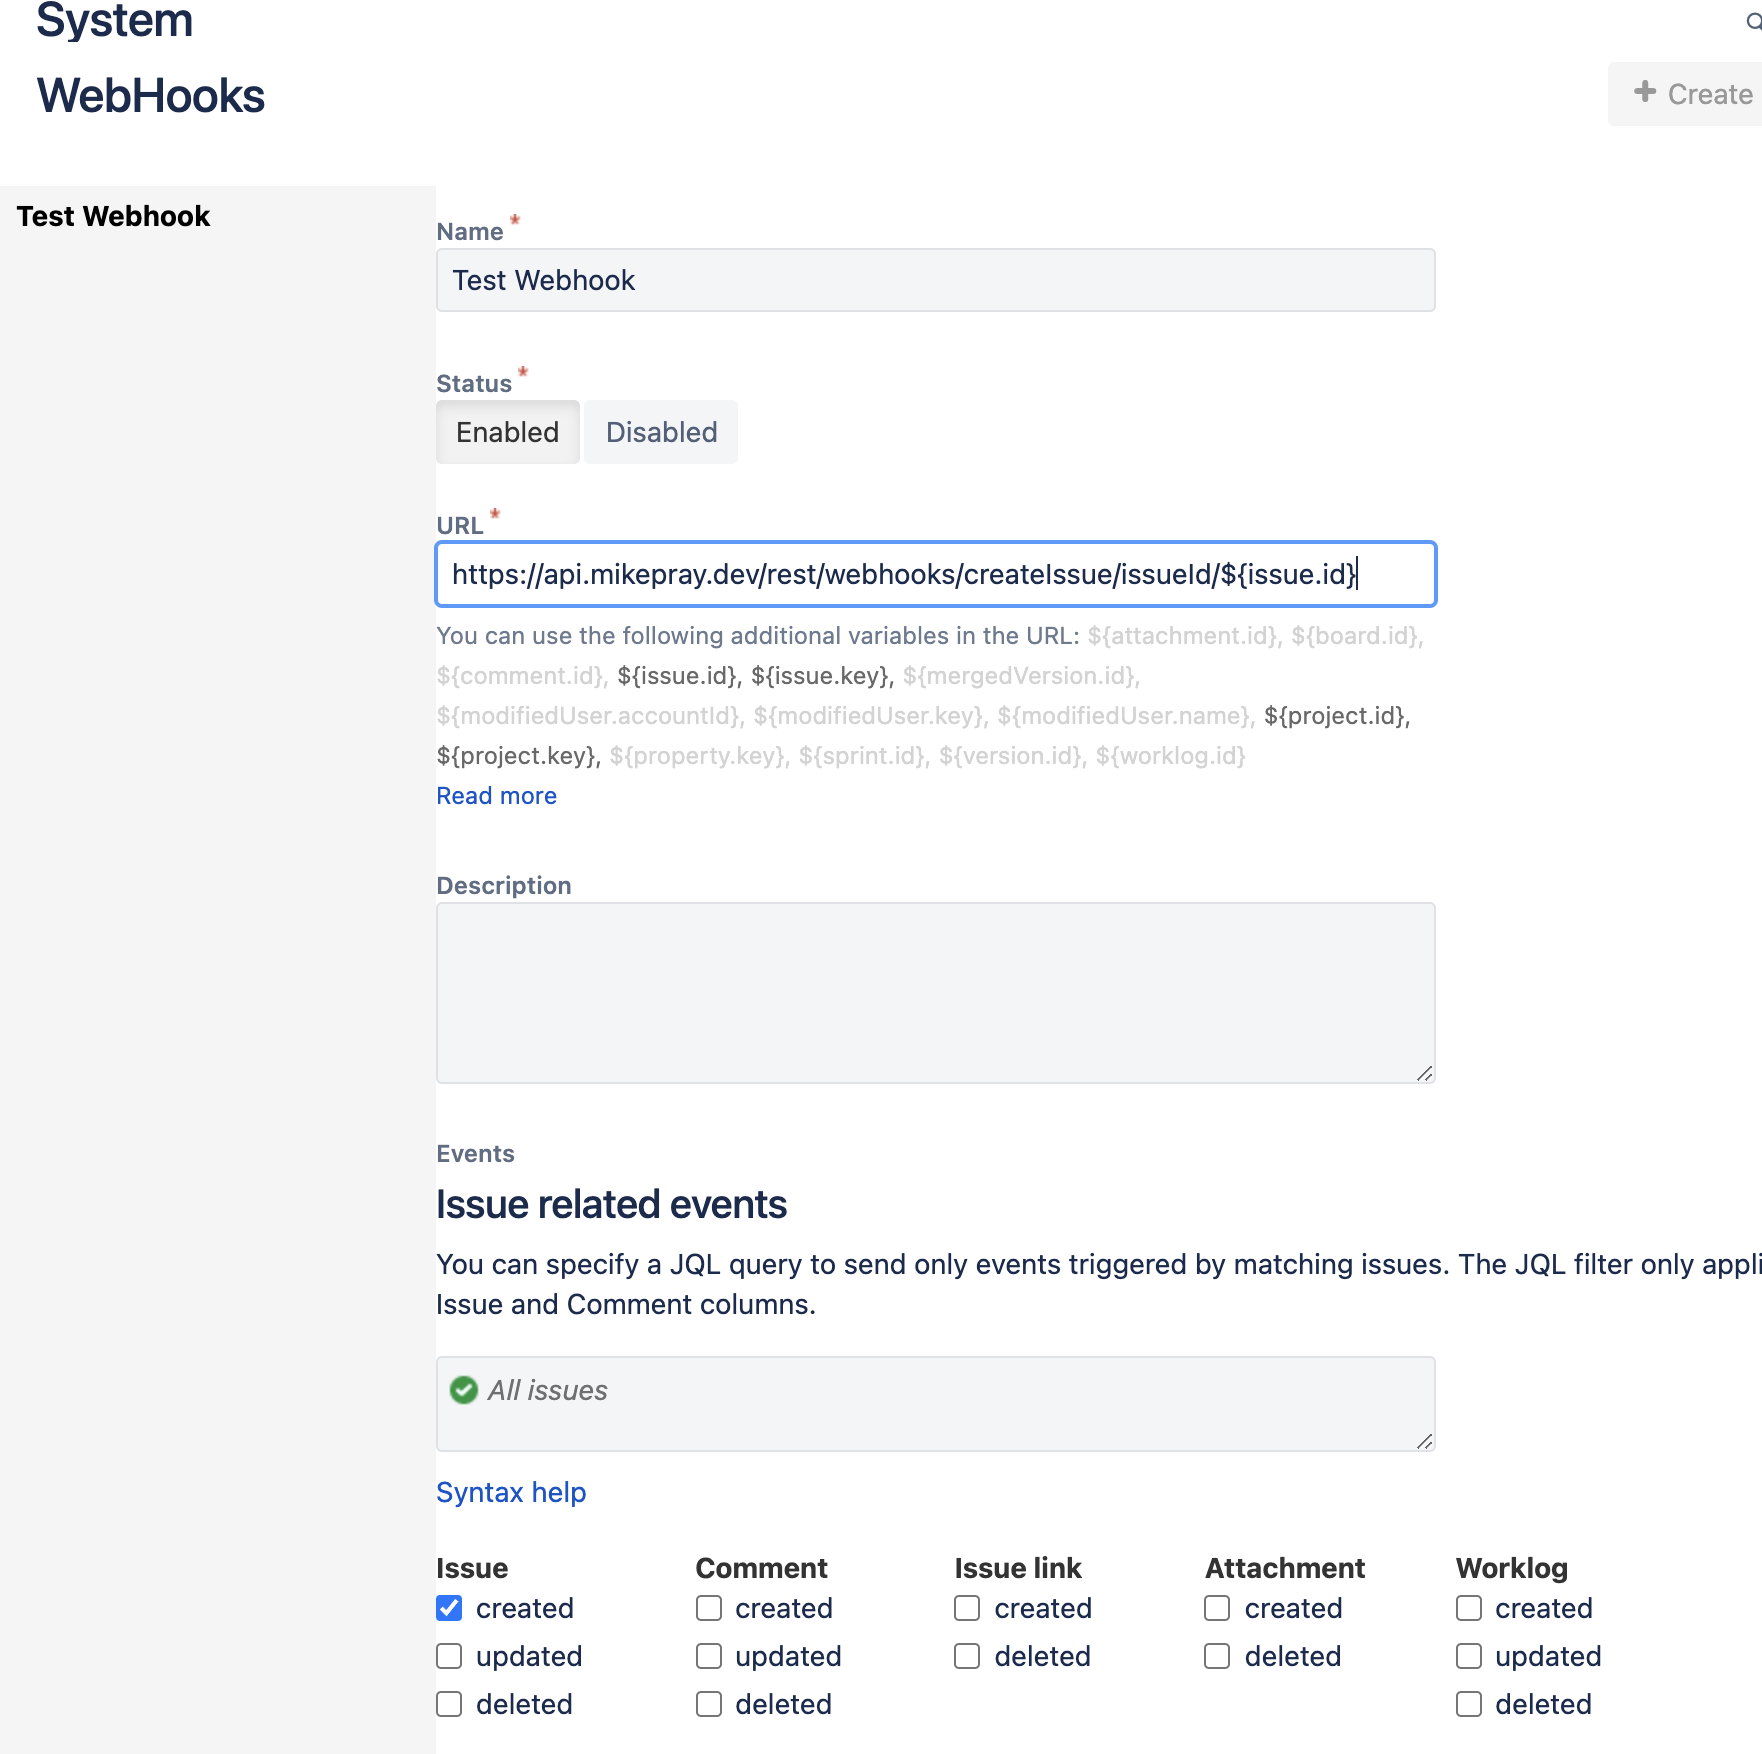
Adding the Jira webhook is pretty easy. Here’s some documentation that helped me, but it was really only a matter of finding the admin page on a Jira Cloud server that I use for testing and registering the webhook.
I set up the webhook with the URL
https://api.mikepray.dev/rest/webhooks/createIssue/issueId/${issue.id}
Jira helpfully allows you to to choose what parameters can be sent into the webhook URL.

Jira allows a single webhook to be registered for multiple actions, like create issue, delete issue, create project, etc. While it’s interesting to set up a webhook to vacuum up every issue, project, or comment update, it doesn’t seem like a good idea. In practice, I’d set up multiple webhooks; one per resource. Possibly one per resource and action.
Setting the Webhook URL
I updated the Express server to add a .post() like this:
app.post('/rest/webhooks/createIssue/issueId/:issueId', (req, res) => {
    res.send('request was ' +  req.params.issueId);
    console.log(req.params);
    console.log(req);
    console.log("====");
});
This updated the URL to match what I updated in Jira. I also aded some basic console logging to print the request parameters. Earlier, I attempted to JSON.stringify(req) but this will cause an exception:
error TypeError: Converting circular structure to JSON
because stringify cannot parse circular objects, and req is circular. To learn more about this error, look here.
!SSL Rabbit Hole!
At this point I tried to get it all running, but ran into some snags - port 8080 and 8081 were already taken by other hobby projects on my Ubuntu droplet. I changed the code to use port 8082. Unfortunately, Jira does not allow custom ports in the webhook URL, and also requires SSL on the default port (443).
Because there were several other applications running directly on the Ubuntu droplet (including several docker containers), I couldn’t use the mikepray.dev domain directly. I also couldn’t use the IP address, because, again, Jira requires SSL.
The solution for this was to set up a new subdomain api.mikepray.dev in Digital Ocean that is reserved for this Express server. Then I used certbot with this command:
sudo certbot --non-interactive --redirect --agree-tos --nginx -d api.mikepray.dev -m (email) --expand
which sets up an entry for the subdomain in nginx’s sites-available/default configuration file.
The magic sauce to get the proxy to work are these lines in the location entry for the subdomain:
location / {
        # added by me
        proxy_pass http://localhost:8082/;
        proxy_set_header Host $host;
        proxy_set_header Upgrade $http_upgrade;
        proxy_set_header Connection upgrade;
        proxy_set_header Accept-Encoding gzip;
        # I commented this out:
        # try_files $uri $uri/ =404;
    }
I’m by no means an nginx expert, and there’s probably something I’m missing or could do better. Oh well!
Finishing the Code
Most of the work was figuring out SSL and the subdomain. If this had been containerized in a higher-level system than an Ubuntu droplet (basically a cloud-hosted virtual machine), it might be simpler. For instance, The Vercel system that this blog runs on was one-click to set up the SSL in Vercel and one A DNS entry for the blog domain.
I cleaned up some of the Express code and tested it by running it directly on the Ubuntu droplet like this:
node server.js > out.txt &
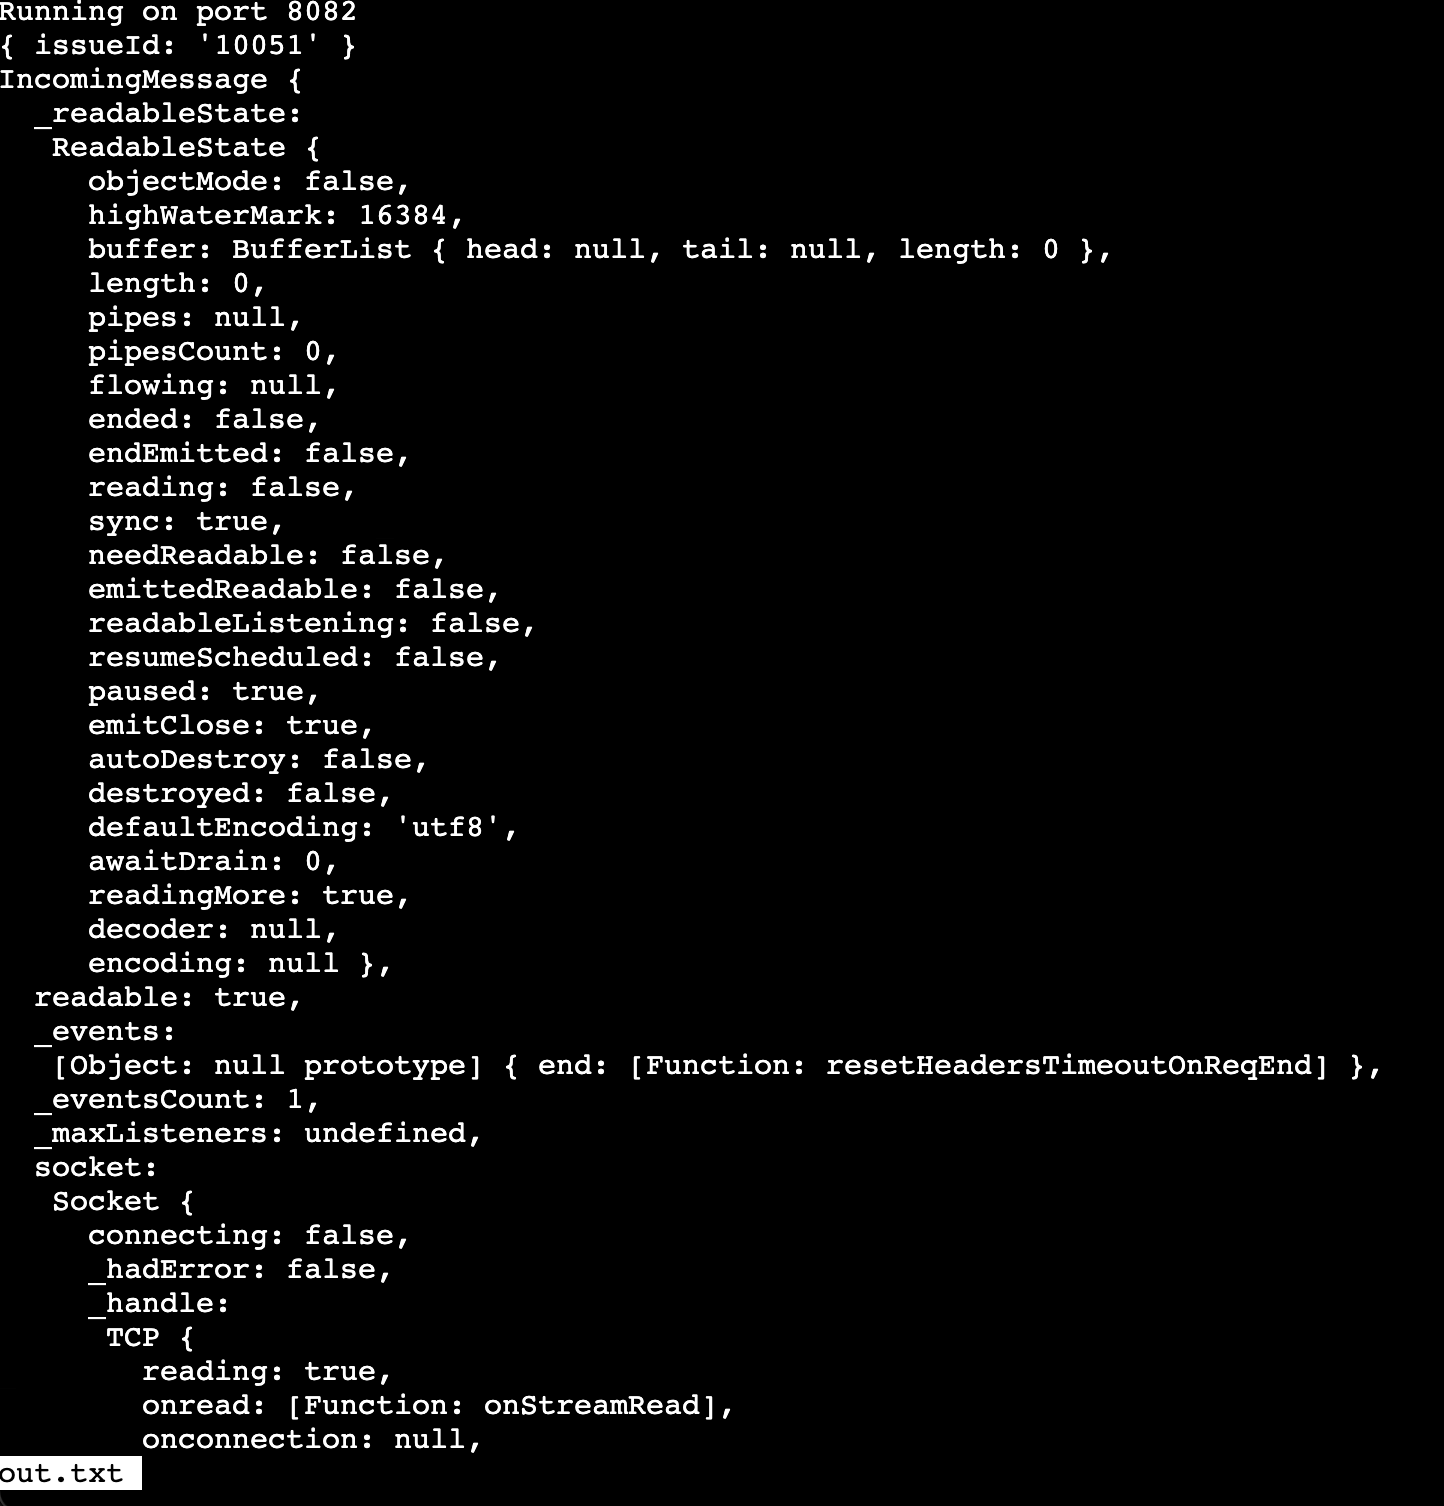
This starts the server in the background and sends the verbose output to a text file.
After starting the server and creating an issue in my Jira Cloud instance, the less output looks like the screenshot below. It’s quite verbose:

Where to go Next
At this point, I can use this setup to help myself understand what Jira’s webhooks provide and what the request parameters contain. I might follow the dockerize.io instructions further to containerize the application and enhance the deploy process.
Thanks for reading!